Lvl. 1 | Stage 4 - Deformers & Deformer Hierarchy
Lesson Objective:
Learn what are deformer is, and the two different types
Learn how to create deformers
Learn what a deformer hierarchy is, and how to create one
Lesson Quests:
Quest 1: Learn what a deformer is
Quest 2: Learn the different types of deformers
Quest 3: Learn what a deformer hierarchy is
Quest 4: Create a Warp & Rotation deformer
Quest 5: Alter a deformers settings
Quest 6: Create a deformer hierarchy
Deformer Types Study File
Quest 1: What is a Deformer?
A deformer is a tool that allows us to bend art meshes without directly modifying them.
It can also act as a folder to hold multiple art meshes or other deformers, and move or deform them as it does.
Quest 2: Types of Deformers
There are two types of deformers:
Warp Deformers
Warp deformers are mainly used to bend and stretch parts.
It uses a grid structure with points to decide how it will manipulate.
Rotation Deformers
Rotation deformers are used for rotational movements. Their position can be keyframed as well.
They cannot deform the shape of art meshes inside of them.
Quest 3: Deformer Hierarchy
Deformers can be organized into a hierarchy, where the deformers can influence movement of one another.
We refer to these as Parent Deformers and Child Deformers.
Parent Deformers
Any deformation made to the Parent Deformer will also deform it's child deformers (deformers within this deformer) and art meshes.
Child Deformers
Can move or deform independently, but will follow the movement of any Parent Deformers.
*All art meshes behave similarly to Child Deformers.
An simplified example of a hierarchy can be seen below:
As you can see, if you were to move the "Master Deformer", everything would move.
If you moved the "Head Deformer" only the parts of the head would move, while the body remained in place.
This knowledge of the deformer hierarchy will help us manipulate the art meshes of the model to create our models movement.
Quest 4 (Part 1): How to Create a Warp Deformer
First select this button on the Tool bar:
This window will then appear:
"Destination Part" decides what folder the deformer will be saved to in the Parts Window.
You can Name the deformer.
Then you have options to create the deformer as:
"as Parent of Selected Object"
or
"as Child of Selected Object"
In this case, we don't have any art mesh or deformer selected before pressing the button, so it will not allow us to choose "Child".
If we have another deformer selected, we can then decide if we want the new deformer to be created as a Parent (above in the hierarchy), or as a Child (below in the hierarchy).
The number of Bezier Divisions and Number of Conversion Divisions determine how dense the grid on the deformer will appear.
More divisions result in smoother deformations, but they also make the model more demanding on your PC.
Press create, and your deformer will appear in your work area:
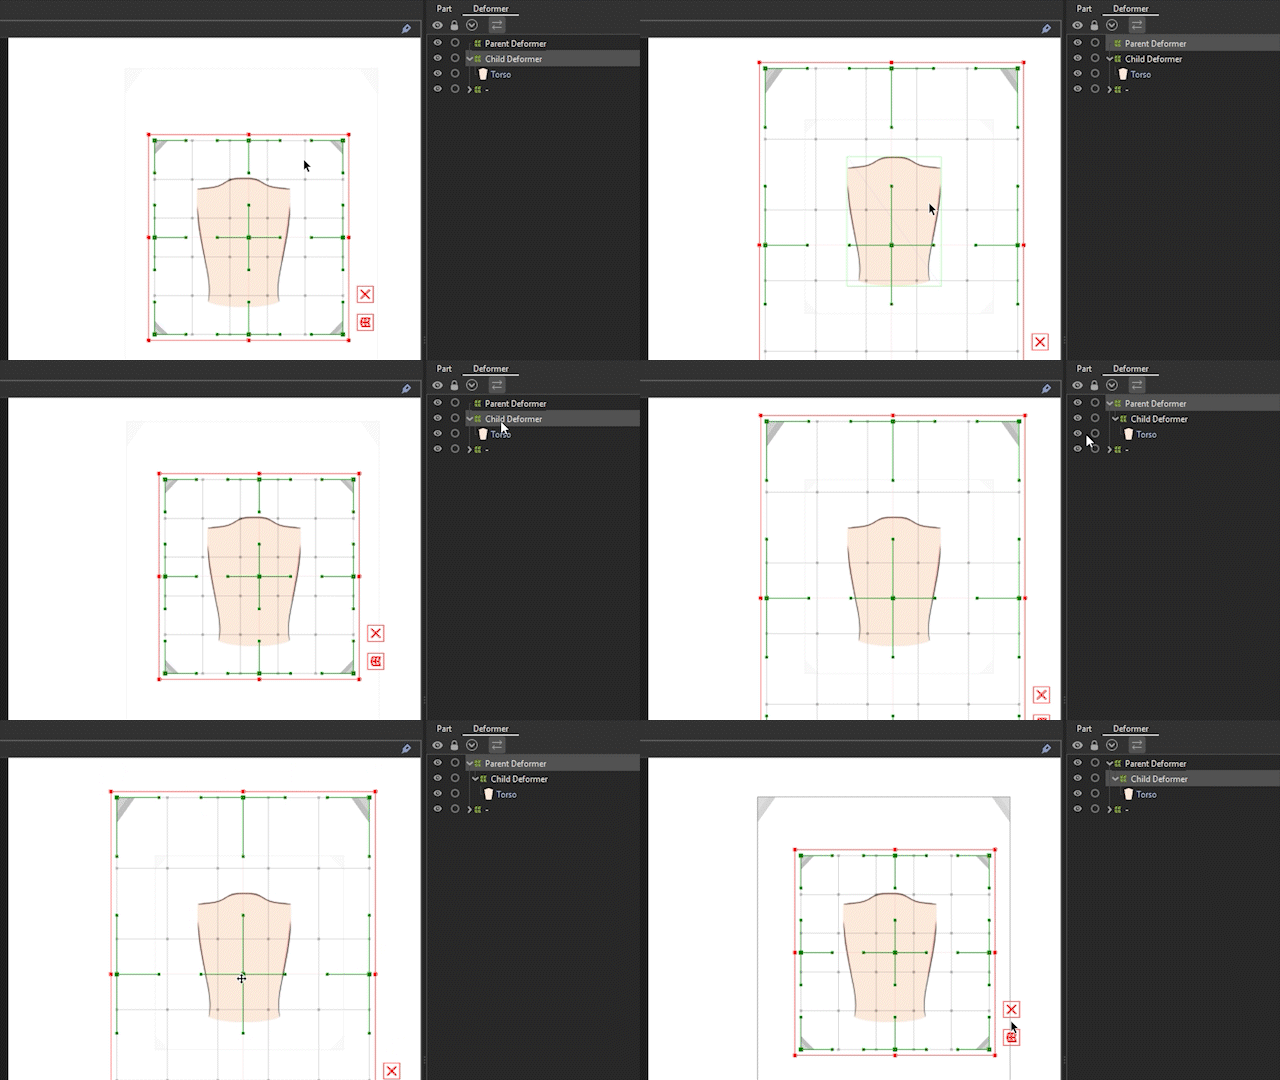
Quest 5: How to Deform a Warp Deformers
Resizing the Deformer:
With the arrow tool selected, you can click and drag on the corners of the red box around a deformer.
This will also resize all child components.Holding down ALT, will resize the deformer around the center.
Holding down Shift, will scale the deformer while keeping it's dimensions.
Holding down CTRL, will allow you to resize the deformer WITHOUT resizing any child objects.You can also use a combination of these three buttons to alter your resizing.
Bending the Deformer:
You can grab points with your arrow tool to move singular points around.
You can select multiple points with the arrow or lasso tool to then move multiple points around.You can use the following brush deform tool to grab points within the brush radius:
Resizing the brush is the same as the manual mesh tool eraser.
Hold B and Left click, then drag right and left on your screen to resize.
Quest 6: Create a deformer Hierarchy
To create a hierarchy, you have to click and drag art meshes and deformers into one another on your Deformer Window.
Just like explained in the section above, clicking on a deformer and dragging it into another deformer will allow you to create a hierarchy.
Then you can drag your Art Meshes into deformer hierarchy's as well. To understand what art mesh goes where, we can look at an example of the one I made for Lua.
Example of the Starting Deformer Hierarchy for the Lua Model
Here is a Study File for the Deformer Hierarchy. You can compare with it, or use it going forward.
Deformer Hierarchy Study File(46.3 MB)
Example Hierarchy:
Master Body [Z]
Master Body [XY]
Breathe
Head X [Body X Movement]
Head Z Rotation (Rotation Deformer)
Face [XY]
Ears [XY]
Bangs [XY]
Mid Hair [XY]
Back Hair [XY]
Face Parts [XY]
Eyebrows [XY]
Nose [XY]
Mouth [XY]
Eyes [XY]
Body [XY]
Torso [XY]
Neck [XY]
Arms [XY]
Waist [XY]
Clear Skirt [XY]
Armor Skirt [XY]
Hips [XY]
Legs [XY]
I do suggest building the hierarchy yourself, but you can use my file if you'd like.
Workflow VOD
Study File
End of "Deformers & Deformer Hierarchy"
Next Lesson:


