Window Navigation Guide
Lesson Objectives:
Learn what each window in the Live2D software is and what they are used for in general
Lesson Quests:
Quest 1: Create a file and look at each window in the Live2D Software
Quest 1: Live2D Cubism Window Navigation
First we need to create a New Model File to work with.
Go to File > New > Model

Once a new model file is created, you will be greeted by the following interface:
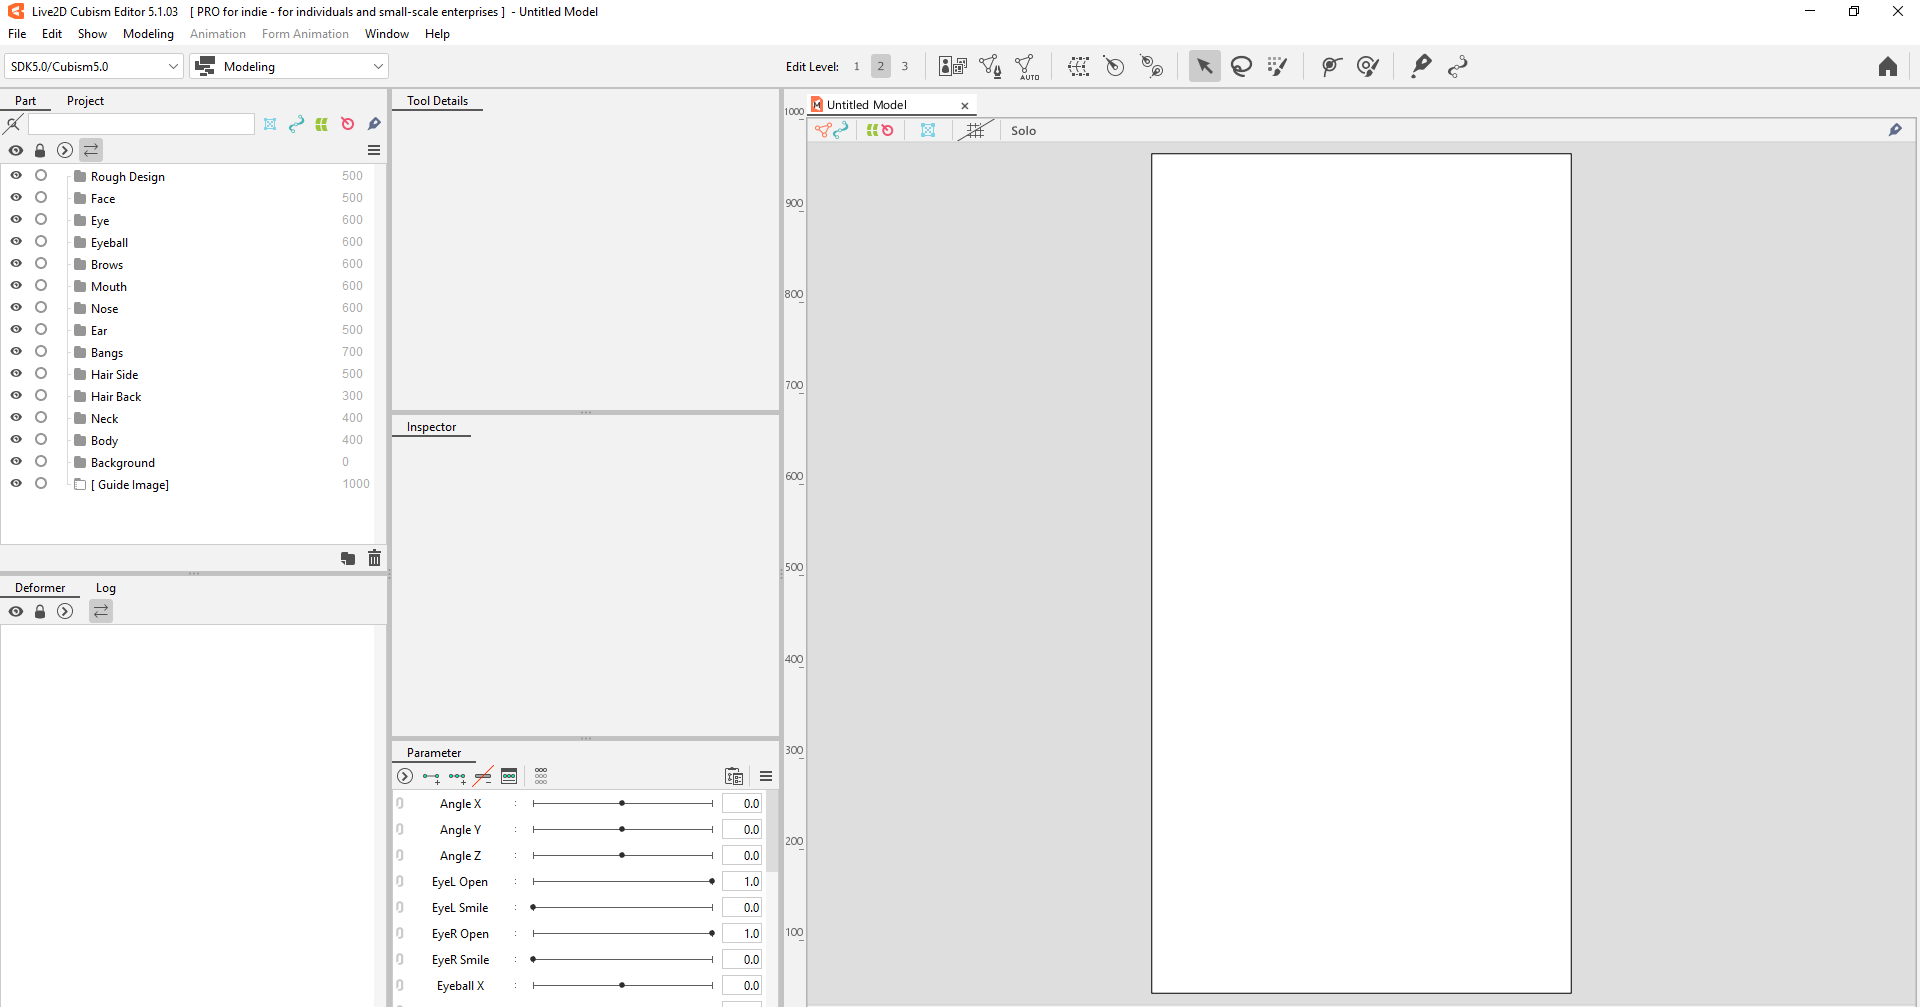
Let's take a look at each window one by one, and learn what each window is used for.
Live2D Software Options:

1 - Live2D Software Options
First, we have Live2D Software Options.
Each tab has a variety of options, it is best if we learn them as we go, and not overload ourselves for now.
Parts Window:

1 - Parts Window
Next, we have our Parts Window
It displays Art Layers & Deformers of the VTuber model and all parts can be neatly organized into folders. It works same way as an art programs layering system, with exception of something called "Draw Order"
Draw Order allows you to control if an art layer will appear in front or behind of other art pieces, regardless of their vertical positioning (If it is higher or lower on the list) in the Parts Window.
It can overwrite the position of an art piece to appear above others, even if it is below on the list.
How it Works:
Each art piece has an assigned draw order value (From 0 - 1000. Higher numbers appear in front)
Parts with the same draw order value, go back to following their vertical position on the Parts Window list.
Example:
If the Eyes have draw order of 600, and the Face has a draw order of 700:
The model will appear as if it has no eyes. The Face art layer will cover the eyes.
If the Eyes have a draw order of 700, and the Face has ad raw order of 700:
The model will display whichever of the art layers is higher up in the parts list on top.
You can also Hide or Lock different parts and folders using the buttons on the left hand side of the window.
The "Eye" icon will hide the folder or art piece.
The "Lock" icon will lock you from being able to move the art pieces.

Deformer Window:

1 - Deformer Window
This is the Deformer Window.
It controls and organizes our deformers and their hierarchy. Deformers allow us to bend, stretch, and move art layers.
We will learn more about deformers within "Level 1 - Stage 4". For now, just know they will be displayed here.
You can also hide and lock layers using the side icons once again.

Tool Details Window:

1 - Tool Details Window
This displays the different options that will be available when you have a tool selected.
Each tool has it's different options, so we'll learn more about each one as we go.
Tool Bar:

1 - Tool Bar
This bar displays the most common tools used in Live2D.
Selecting the tool you need, and alter it's options within the Tool Details Window. Again, we will learn more about each tool as we go to use them.
Inspector Window:

1 - Inspector Window
This window allows you to adjust the properties of selected objects. Things like the Name of the Art Layer will appear here.
These objects would include Art Meshes, Deformers, & Parameters.
Parameter Window:

1 - Parameter Window
This window holds all the parameters of the VTuber Model.
This is the window that "remembers how the model moves" by using keyforms.
We will learn how to use Parameters in "Level 1 - Stage 5".
Workspace Window:

1 - Workspace Window
This window is where your Live2D Model will appear, and where we will do all our animation work.
Holding Space & Left Click dragging allows you to drag the canvas around.
Middle Mouse Scroll allows you to zoom in and out of the canvas.
End of "Window Navigation Guide"
Next Lesson: